Friday, October 24, 2014

The smells of autumn: Maple sweet potato cupcakes with whipped cream cheese frosting

Pumpkin is everywhere right now. I've seen pumpkin toaster pastries, pumpkin coffee drinks, pumpkin cakes and cookies and crisps... now don't get me wrong, I'm a big fan of pumpkin, but these are a nice change of pace. Sweet potato and spices give these a perfectly autumn taste and the dollops of so-light-you-can't-believe-it frosting sit on top like little clouds. I made these for Halloween topped with candy corn, but they'd be equally well-suited for Thanksgiving or Christmas, too.


Maple sweet potato cupcakes with whipped cream cheese icing (makes 2 dozen)

  • 2 cups of cooked sweet potato, mashed smooth
  • 1 cup vegetable oil (you can substitute applesauce to make these lower fat)
  • 1 1/2 cups brown sugar
  • 1/2 cup maple syrup
  • 3 eggs
  • 1 teaspoon vanilla extract
  • 1 cup whole wheat flour
  • 1 1/2 cups all-purpose flour
  • 3 teaspoons ground cinnamon
  • 1 teaspoon ground ginger
  • 1/2 teaspoon nutmeg
  • 1/2 teaspoon allspice
  • 1 teaspoon baking powder
  • 1 teaspoon baking soda
  • 1/2 teaspoon salt
Preheat oven to 325 degrees and grease muffin pans or use liners.

Blend together sweet potato, oil, sugar, syrup, eggs and vanilla in a large bowl. If the sweet potato doesn't seem quite smooth, use an immersion blender for this step.

Sift together flours, spices, leaveners and salt and fold into the wet ingredients.

This recipe rises high, so fill cups half full. Bake for 20 minutes or until cake springs back when pressed.

Whipped cream cheese frosting (makes enough for 1.5 to 2 dozen cupcakes, depending on  how much you use)
Note: Instead of vanilla, you can use cinnamon, caramel, or any other flavoring that sounds good to you.
  • 8 ounces cream cheese
  • 1 cup heavy whipping cream
  • 1 cup confectioner's sugar
  • 1/4 teaspoon salt
  • 1 teaspoon vanilla extract
In a chilled bowl, whip cream until soft peaks form. Add in sifted sugar and  continue beating until peaks hold. Put the whipped cream into the refrigerator to keep it chilled.

In another bowl, beat the cream cheese, salt and vanilla until soft and fluffy. Very gently fold in the whipped cream and then blend together with the mixer until completely blended. Pipe onto cupcakes as desired.

Sunday, October 12, 2014

Fluffy Sunday Morning Scones

The past year has taught me -- again and again and again but let's not ruminate, yes? -- that food is about more than nourishment. Food can be a ritual, a tradition, a comfort. And for me, one of the most cherished routines has often been Sunday morning breakfasts. 

Saturday mornings in our household are for rushing headlong into the weekend... tackling all the tasks that have built up over the week, and jumping straight into special kind of chaos that only having two littles around the house can bring.

But Sundays... Sundays are different. After a whole day of rushing here and there with two children in tow, Sundays are more about slowing down a little bit and getting ready for the coming week. Sunday mornings are about enjoying your cup of coffee instead of gulping it down, and maybe getting a little indulgent with breakfast with things that could stand in for dessert.

Enter... scones. Sweet but not cloyingly so, rich, crumbly and practically melting on your tongue, scones are easy to whip up first thing in the morning but are just as good made the night before so you can hopefully eke out a few more minutes of sleep. 

This recipe is endlessly customizable with whatever flavors strike your fancy. I've made them with vanilla and chocolate chips, almond flour and almond extract topped with sliced almonds, and sweet cinnamon. But how about dried blueberries with some lemon zest and juice in the dough? Or bits of chopped apple and some caramel extract? Or perhaps a drizzle of simple glaze to take it over the top?


Fluffy Sunday Morning Scones
  • ½ cup butter
  • 2 cups flour - I usually use a blend of whole wheat and all-purpose
  • ½ cup sugar with a little extra for dusting
  • 1 teaspoon baking powder
  • ¼ teaspoon baking soda
  • ½ teaspoon salt
  • 1 large egg
  • ½ cup yogurt (preferably full-fat)
  • 1 teaspoon vanilla extract
  • ½ cup chocolate chips

Preheat your oven to 400 degrees and line a baking pan with parchment paper.


In a medium bowl, use your hands, a pastry cutter or a food processor to blend the butter in with your flour, sugar, leaveners, and salt until it looks like coarse crumbs.


In a separate bowl, blend together the egg, yogurt and vanilla. Add to butter + flour mixture and gently press until dough holds together; add a bit of milk if needed to help it hold together. Add in chocolate chips if using them, or any other stir-ins. Scoop the dough onto your pan, sprinkle with sugar to prevent it from sticking to your hands, and gently pat it into a disc. Don't worry about making it perfect, as a bit of imperfection will make for a wonderful rustic texture! Cut into 8 wedges; pull them apart a bit and bake for approximately 15 minutes.

Sunday, August 10, 2014

Chocolate cupcakes with fluffy marshmallow frosting

As much as we'd all like to deny it as we savor our kale salads and homemade yogurt, there's a part of our brains that occasionally lingers on those oh-so-unspeakable treats from our childhoods. You know, the kind that came in boxes on grocery store endcaps, with a shelf life of at least 2 years.

But you can't actually go back there. It's like going back to a childhood home... it's never quite the same way you remembered it.


So you recreate what you remember, but you make it better. No shortening. No chemicals. No artificial ingredients. Nothing that could sit forgotten for a few years in the back of the pantry, and still look exactly the same as the day you picked it up for 2/$1.

So today, I bring you the recipe for light, spongy chocolate cupcakes with a fluffy marshmallow frosting that melts in your mouth. The cake is springy, moist and flavorful; the frosting is dense enough to be sinful but light enough that it doesn't overwhelm the cake.

Here is the recipe, and a picture of them topped with a single chocolate wafer:

and as an alternative, sprinkled with mini chocolate chips instead:

Chocolate cupcakes with marshmallow frosting
(this recipe makes 2 dozen with a few extra for placating your hungry family, who apparently cannot wait all of one day until the party)
2 cups all-purpose flour
1 teaspoon salt
1 teaspoon baking powder
2 teaspoons baking soda
3/4 cup unsweetened cocoa powder; I used Ghirardelli
2 cups white sugar
1 cup vegetable oil
1 cup hot coffee
1 cup buttermilk
2 large eggs
1 teaspoon vanilla

For marshmallow frosting:
1.5 cups butter 
3 cups confectioner's sugar
1 teaspoon vanilla extract
2 tubs of marshmallow fluff

Preheat your oven to 325 degrees Fahrenheit. Grease your muffin tins, or use liners.

In a large bowl, sift together the flour, salt, baking powder, baking soda, cocoa and sugar. 

Mix in oil, coffee, buttermilk, eggs and vanilla. Mix just until blended. Batter will be thin, and rise high, so fill cupcake tins halfway only. With this recipe, I would recommend filling and baking your pans ASAP - don't pre-make this batter and let it sit out on the counter.

Bake for 18-20 minutes, rotating pans halfway through if necessary, and just until cupcakes spring back when pressed with a finger. Cool in pans for 10 minutes, then remove from pans to cool completely.

At this stage, I usually vacuum seal the cakes and then freeze them in our chest freezer until the day of the event. I believe they are actually better after a freeze and thaw than they are fresh out of the oven... but that's just me. They do have to be fresh when you put them in the freezer though... no freezing is going to bring back stale cupcakes! If you do freeze them ahead of time, unwrap them completely and let them thaw before you decorate. It won't take long... never takes mine more than an hour.

To decorate these, I used a marshmallow buttercream frosting that tastes of marshmallow but is sturdy and pipeable like a buttercream. Simply whip together 1.5 cups (3 sticks) of butter, 3 cups of sifted confectioner's sugar, and 1 teaspoon of vanilla extract on medium-high speed. When it's fluffy, add in 2 tubs of marsmallow fluff and gently whip on low speed until completely blended together and no large air bubbles remain.


Tuesday, August 5, 2014

Finding beauty

Irish Boxer Husband claims that for the longest time, I wasn't much of a fan of cut flowers... he might be right, as I have no doubt his memory may occasionally be more reliable than mine, but I have decided that I love flowers and can't have too many of them around the house. Attached to a plant and living or in a vase, I see their glowing colors their delicacy, and that subtle iridiscence... and it makes me happy.


Tuesday, March 4, 2014

There's crazy, and then there's crazy. But then there are chickens.

It's been a long time. Things have been crazy. Well, things are always crazy, but recently they have been exceptionally crazy. I'm just going to leave it at that.

Whenever things get bad, I always crave normalcy. So in the face of everything, we outsourced the chicken run so we could get it finished...

 ...the guy went a little crazy...

 ...and then had six chickens delivered over the weekend (after the crazy rainstorm).

3 - 4-week Easter Eggers
2 - 4-week Black Australorps
1 - 6-week Rhode Island Red


Some of them are a bit tattered due to being beat up on a little before they got here. Yikes. But so far, all but the RIR are doing well and settling in just fine. They sleep in a big pile in the corner of the coop and are getting along.
 
Unfortunately, the RIR is causing issues... dare I say, she might be a little crazy? I've caught her picking feathers off the others, and last night she pecked at my shoes before flying at my face and then repeatedly flying against the walls of the run. We're going to keep an eye on her and make a call by tonight if she's going to stay or go. Any advice on dealing with an aggressive chicken is appreciated. :-)

And so begins a new adventure!

Wednesday, January 15, 2014

The growing that will happen at the end of the tunnel

Today is day 9 in the hospital, and the walls are definitely starting to cave in on me.


The incessant beeping, fluorescent lighting, doctors and nurses at all times, needles, tubes, endless medications... It all wears a person down. Not to mention I have never been away from the Irish Boxer Husband (who visits everyday), Monkey (who has been brought by once) and Lion Cub (who charms all the nurses) for this long. And the garden, too! Thank goodness for my wonderful friends who do all they can to keep me sane and fighting.

So to try and stay positive, I figured I would start planning out my 2014 growing. In a fit of just-because-I-am-stuck-here-doesn't-mean-I-can't-do-some-damage, I ordered a mess load of fruit trees. I also have all the seeds I ordered and also saved from last year's crops. So in a nutshell, here is what I am setting myself up for, existing and new:

Trees/fruit

  • Low Chill Apple, 3 on 1 
  • Flavor Grenade Zaiger Pluot
  • Gold Kist Apricot 
  • Burgundy Japanese Plum 
  • Saturn Peach Tree 
  • Black Beauty Fruiting Mulberry 
  • Snow Queen Nectarine 
  • Hachiya Persimmon 
  • Fuyu persimmon
  • Desert Gold Peach
  • Babcock Peach
  • Garden Prince Almond
  • Spice Zee Nectaplum
  • Meyer lemon
  • Mexican lime
  • Nagami kumquat
  • Black Mission fig
  • Hass avocado (he needs a friend!)
  • Raspberries (Heritage, Fall Gold) and Blackberry (Triple Crown)
  • Southern low-chill blueberries, I forget the exact types
  • Sequoia strawberries

Vegetables
  • Tomatillos, green and purple
  • Tomato: Amish Paste, rainbow cherry mix
  • Green Globe artichoke
  • "Summer Melody" squash mix
  • Kabocha squash
  • "Mixed fingers" eggplant mix
  • Bush beans: Contender, Tendergreen
  • Pole beans: yard long, Rattlesnake
  • Buttercrunch lettuce
  • Cucumber: lemon and straight eight
  • Peppers: Chinese Giant and Tam's Jalapeño
  • Red orach -- very curious about this one!
  • Garlic: Music, Russian Red, Elephant, CA Early have all been planted along with shallots

Herbs
  • Basil basil basil!
  • Cilantro, slow bolt
  • Garlic chives
  • Chives
  • Thyme
  • Maybe a few others... IBH got me a pack of seeds and many I am not even familiar with

Flowers

  • Sunflowers
  • Nasturtium
  • Cosmos (no choice here -- they are volunteering all over the place)
  • Calendula
  • Wild flowers

I don't know where I am actually going to *put* all of these... But it should be an exciting summer!

Thursday, January 2, 2014

Yellow and green - Korean side dishes

If you've ever had an authentic Korean meal, you know that any entree you order will be accompanied by a variety of side dishes, or "banchan." Having a tiny bit of this, and a bit of that... you're guaranteed a well-rounded meal. I love the way that the dark green and light yellow of these two dishes look together, so often will plate them side by side.

"Spinach" and soybean sprout side dishes (banchan)

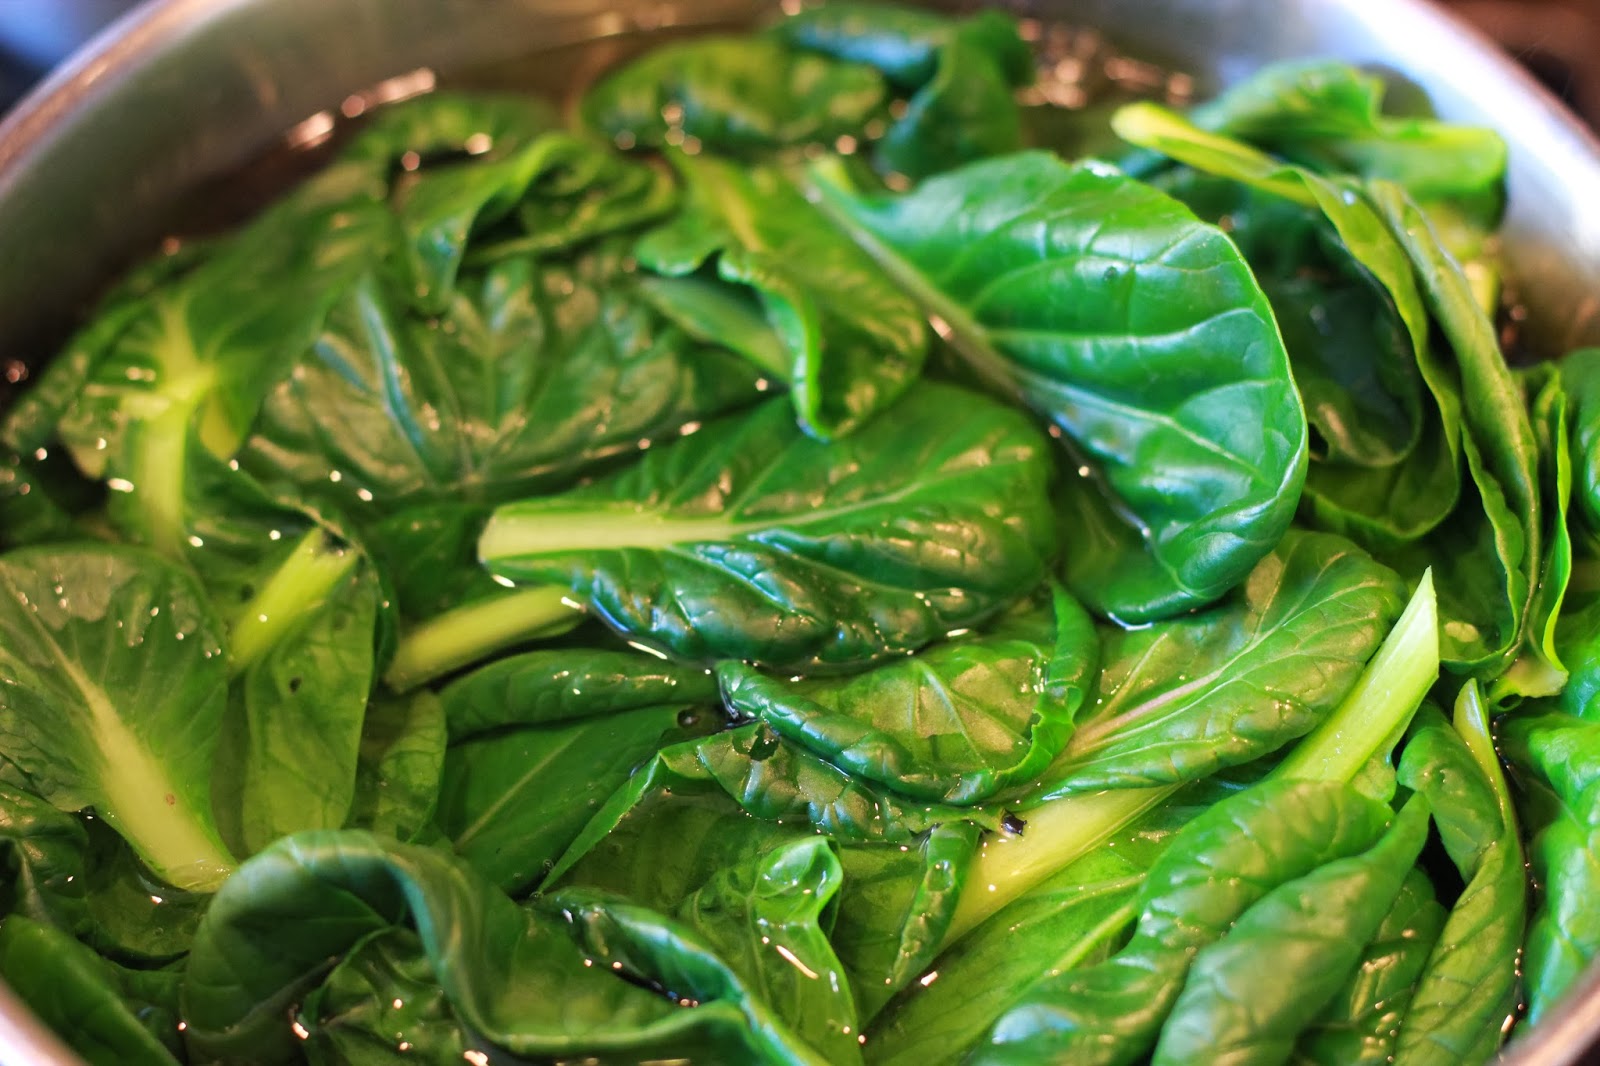
The "green" is typically made with spinach, but I had a messload of tatsoi (a type of mustard green) in the garden that needed to be cut and it worked out just fine. You could probably use swiss chard, collard greens, or just about anything in that family. I picked up organic soybean sprouts at the Korean market but you can also sprout your own.

First, wash your greens. You want them clean. :-)


Bring some salted water to a boil, and drop your greens in; spinach wilts very quickly, but tatsoi took just a minute or two longer... you want it all well-wilted but not completely disintegrated so keep a close eye. It shouldn't take long.


Then you drain the greens and squeeze out the water.

In the spirit of efficiency, I used the same salted boiling water to cook my "yellow" -- the soybean sprouts -- for about 5 minutes.You want them to no longer be crunchy but definitely not mushy.


I then drained the sprouts as well.

The same seasoning was used for both. Sorry this isn't very precise, but I totally took a pinch-of-this-and-dusting-of-that approach.
  • Splash of soy sauce
  • Just a few drops of sesame oil
  • Dusting of red pepper flakes
  • Salt and pepper to taste

 Two friends, made to be together!


Tuesday, December 31, 2013

Taking the time

I've probably mentioned this before, but Irish Boxer Husband and I both work full-time at demanding jobs. We have a very busy five-year-old Monkey who has birthday parties, playdates, swim lessons and school functions. Then we added a five-month-old Baby Bluebird (soon to be renamed Lion Cub, BTW) to the mix. Last year we bought a house on a half acre and proceeded to completely gut and renovate the interior... and when it was about 95% done, we started to move mountains outside to reshape the landscape completely.

All this to say, we don't have a lot of spare time on our hands. I can't remember the last time we went to see a movie -- wait, yes I do... it was more than 6 months ago -- and we've had exactly one date night since Lion Cub was born. I'm naturally an introvert, and crave peace, and quiet, and calm, so it's silly little chores like shelling peas (when's the last time you shelled peas?!?) that help me maintain my sanity.

It's been a challenging few weeks... months... okay years... but something as simple as my Lincoln peas finally gearing up into full production so that I can get more than a handful of peas at a time is what keeps me balanced nowadays.


Monday, December 30, 2013

Dinosaur plants

What a crazy month it's been... on top of all the usual, we had some extra doses of drama and chaos that made this year even more challenging. But the Monkey declaring "This has been the best Christmas ever!" made all the troubles fade into the background, even if only for a day.

One of the running jokes between the Irish Boxer Husband and I is his inability to keep a secret, especially when it comes to gifts. He had no choice but to give me this one early when I declared, a few weeks before Christmas, that all I really wanted was a plant. Well, he had one already in the mail, so out it came (and off he went to go look for something else that could still be a surprise).

This plant is interesting. The "dinosaur" stuff may be a little heavy on the marketing, but it was truly remarkable to see a ball of dried-out grass turn into a lush green plant in just an hour.

The outside of the box:

He actually bought two. Here's what they looked like when I unwrapped them. Not much to look at...

 Set it up in a little dish with some lava rock...

Add a teensy bit of water... and then wait all of TEN MINUTES.

Twenty minutes later, you see green, and unfurling action...

Thirty minutes later, lots of green and a pretty rosette shape...

 After an hour or so, here's how it looks. Quite a dramatic transformation for just an hour.

It actually started to mold a little bit after a week or so, so IBH put them outside and sure enough they turned right back into dried grass balls. If you want your very own, you can find it here:

The Amazing Desktop Dinosaur Plant
A Pre-historic Evergreen That Just Won't Die This one-of-a-kind plant has lived on the Earth for over 290 million years and has the ability to “come back to life” (much like the undead) over and over again for hundreds of years! Simply place this seemingly dead ball of foliage in water and within hours it transforms into a vibrant green blood-sucking evergreen. Ok, we are kidding about the blood-sucking part. It's still amazing though! It's also great for lazy folks since you can forget to water your Dinosaur plant whenever you want! It will simply dry up and hibernate for up to fifty years and will spring to life every time it is given water.

Some Interesting Tidbits about your Dinosaur Plant:
  • During the Carboniferous period these plants used to grow over 120 feet tall (bigger than a T-rex)
  • When dry it curls up into a tight ball so that the wind can easily roll it to a new location or cubicle, hopefully closer to moisture.
  • Retains 3% of its water when it is dehydrated.
  • Grows to be about 4"
  • Enjoys life so much it survived the Ice Age
Kit includes:
  • Live Dinosaur Plant (Selaginella Lepidophylla)
  • Bag of genuine Volcanic Lava Rock
  • Display Bowl

Monday, December 16, 2013

TV and Korean dumplings (mandu)

I don't watch much TV. I might have, many years ago, but nowadays our Netflix queue is completely dominated by Jake and the Neverland Pirates, My Little Pony, Miffy, and Strawberry Shortcake. Once a week though, on Sunday nights, I will occasionally watch a few episodes of something or other... currently it's Fringe.

So last night, after the kids were down and the house was quiet, I watched three episodes back-to-back with the Irish Boxer Husband. But instead of being curled up on the couch under a blanket with a mug of tea, we made mandu. It's so much better knowing exactly what goes into them, making them with the ingredients we like, and it probably works out to be cheaper. And while we made almost 200, you certainly don't have to make that many at once... though good company certainly makes it go quickly and you can easily freeze them so you never run out.

Keep in mind, you can make mandu with almost anything. All vegetarian, different meat, seafood... feel free to customize.

Korean dumplings (mandu)
3 packs of dumpling/gyoza skins
2 pounds of ground beef
1 pack of firm tofu
6 cups of mung bean sprouts
2 cups of Korean chives (buchu)
2 carrots
4 cloves of garlic
1 egg
4 tablespoons of soy sauce
2 tablespoons of sesame oil
1 tablespoon vegetable oil
Salt and pepper

Chop the chives and combine with vegetable oil, mix well. I saw this tip on Maangchi's blog and she says it helps keep the vegetables moist.

Cook with sprouts in a little bit of water in a big saucepan until they are quite limp but not totally disintegrated. It took about 5 minutes for me. Then chop roughly.

Very finely chop the carrots. You don't want to bite into a big chunk of crunchy carrot when you eat your mandu! Do the same with the garlic.

In a big bowl, mix the ground beef, tofu (you crush it with your fingers as you mix), sprouts, chives, carrots, garlic, egg, soy sauce and sesame oil. Whew! Season with salt and pepper. If you're not sure if the seasoning is quite right, I cook a tiny bit of the filling in a frying pan to taste it.

It's mandu-making time! I used the rounds, but they come in squares, too... the process is basically the same. Set yourself up a little working area with your filling, skins, a little bowl of water, and a baking sheet lined with parchment paper. And of course, your episode :-)

Dip a finger into the water and use it to wet the edge of half the skin.

Then put in about a tablespoon's worth of filling. You'll learn how much you can fit after you've done a few, and it'll start to go much faster at that point.

Fold over the skin, and press firmly to seal tightly.

Then wet the outside edge and put in three pleats to really help hold the mandu together. Otherwise, they might break open while cooking and nobody wants that!

We put ours on baking sheets to freeze. After three episodes of Fringe, we had nearly 200 made.

The baking sheets went straight into the chest freezer and I'll bag them up once they're solid.

Some couples go bowling, or watch a movie, or take long moonlit walks on the beach. We make mandu!

Winter growing

This is the first winter I've done any real growing, and I'm now confident that I vastly prefer cool-weather gardening over the summer. Granted, winter in San Diego County means there is a chill in the air and the nights just MIGHT dip below freezing... MAYBE. Which means putzing around out there is much more enjoyable than during the months of 100+ temps and blazing sun.

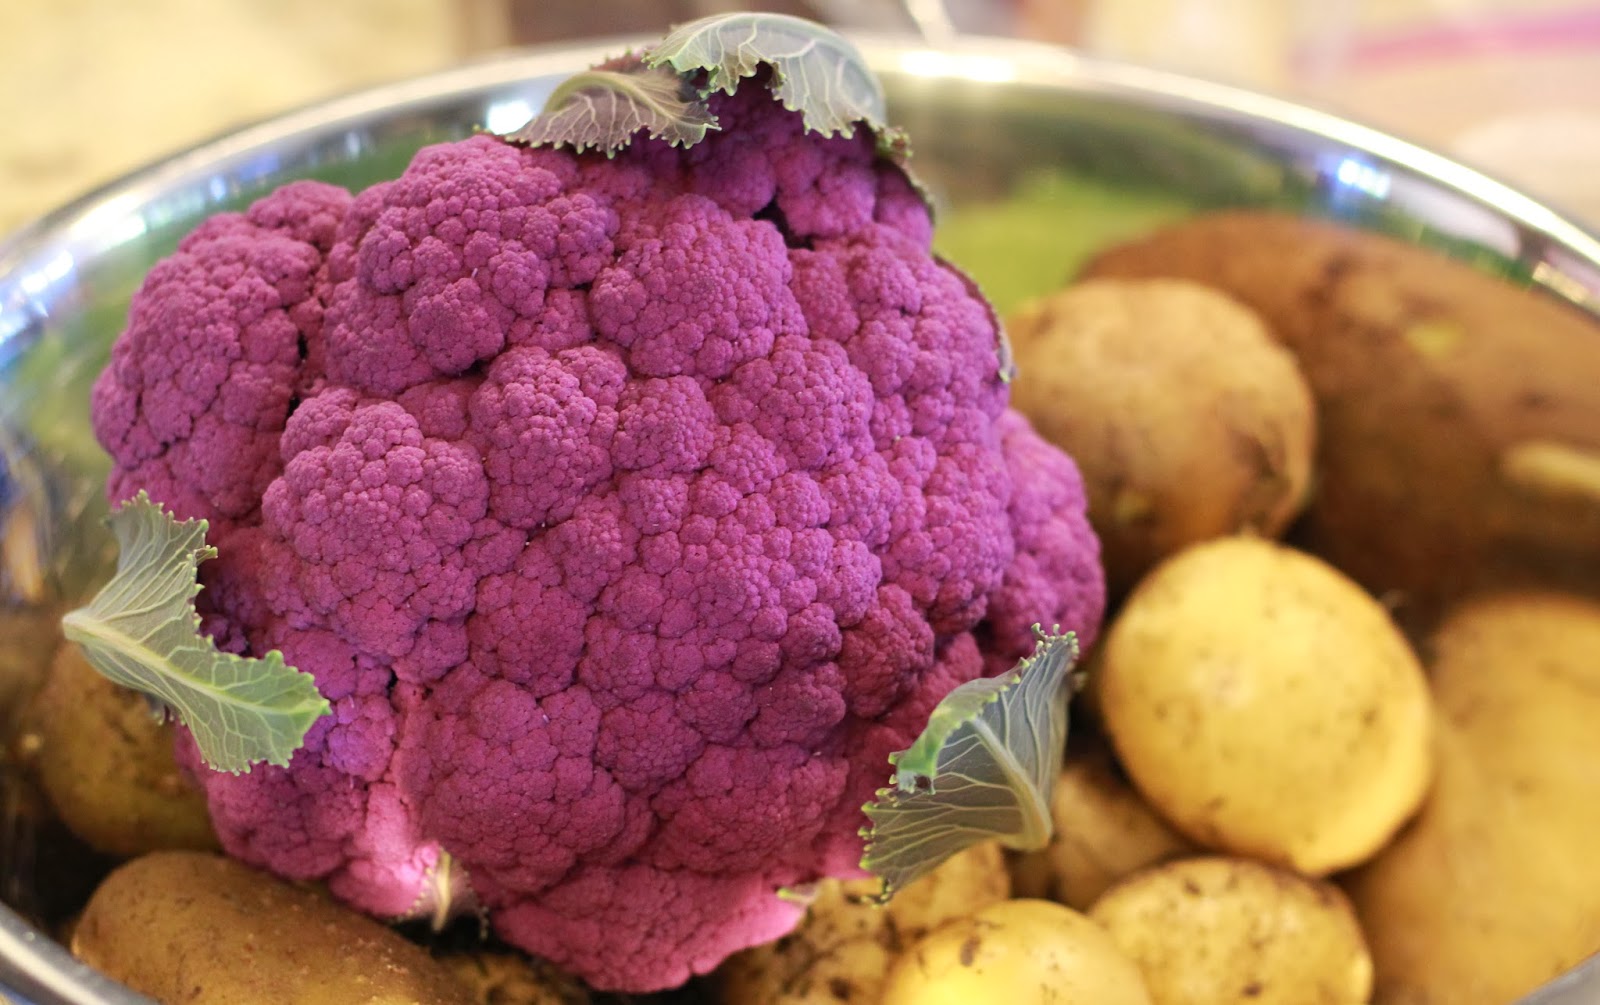
I harvested our second head of Graffiti purple cauliflower, as well as the potatoes from one of my Smart Pots. I should have given it at least another month, but I went ahead and did it. Because I prefer my potatoes small. My impatience has absolutely nothing to do with it. Nope.


The garlic is sprouting, the peas are producing, the leeks are swelling, the greens are all still pumping out leaves, and I have managed to leave my other potatoes in the ground to continue growing. Love winter.

Friday, December 13, 2013

Oh-so-cute Parisiennes... carrots, that is.

I've never grown carrots before. Between our warm climate, the difficulty in getting them to germinate, their general finickiness, and the fact that I can get a bag of organic "baby" (yes I know they're not really babies) carrots for under a dollar at Sprouts, I never really saw the need. But I got a sample pack of Parisienne carrot seeds so decided to see what would happen.

My dish of carrot seedlings actually had to endure a few late-season heat waves -- which incidentally haven't stopped, but I digress -- so went from a thick planting to only a few of the strongest making it. I thought of the whole thing as a project of curiosity and yesterday actually was able to pull a couple carrots!

Haven't tried them yet, but do find them almost irresistably cute. Who knows, maybe I'll sow some more.

Parisienne carrot
Small, round carrots that are so popular in France. Tender, orange globes are superb lightly steamed. Easy to grow even in heavy soils. This little carrot is great for home and market gardens, as this variety is fairly uniform.
 

Wednesday, December 4, 2013

Purple!

I like to grow things that are either prohibitively expensive to buy, hard to find, or best when extremely fresh. And I usually have a long list of things I want to try but am not above an impulse buy at a neighborhood nursery, either! While putzing around the garden the other day, I realized I must have purple on the mind...

Chitting a batch of these beautiful purple potatoes to plant out by end of the year, once the Russetts and Yukon Golds are done... I thought it was so neat how even the little sprouts are a dark, intense purple.

Purple Majesty potato
Oblong. mid season potato with smooth dark purple skin. Almost solid purple inside unlike All Blue. Very good table quality. Makes a great blue potato salad.

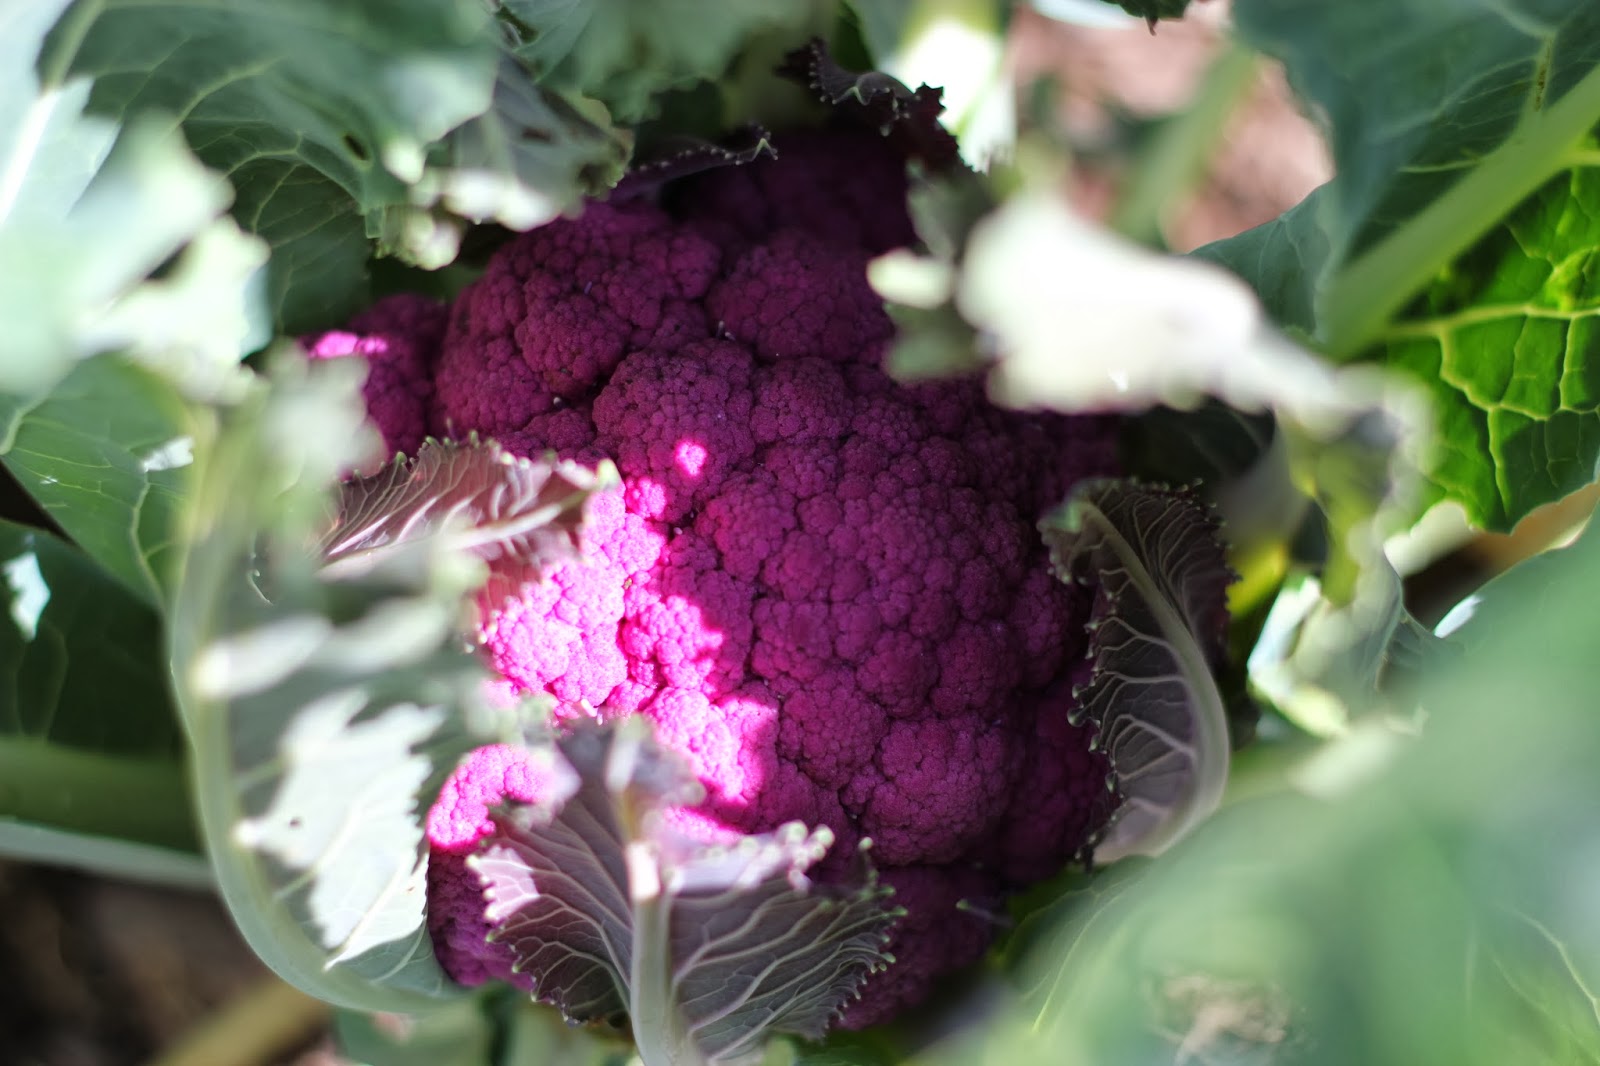
I picked up a six-pack of purple cauliflower transplants on a whim from our Green Thumb nursery. I had no idea if they'd even grow in our climate, let alone head, but two out of the six have good-sized heads now and the other four look like they're right behind. I'm so excited to try them. Since purple is the little Monkey's favorite color, maybe she'll be more inclined to eat it too...


Graffiti cauliflower
The medium sized heads of this vigorous, uniform, main-season cauliflower are intensely purple, with large, purple wrapper leaves. It looks absolutely stunning when served raw on a veggie platter, but also retains most of its colour when cooked. A novel, nutritious, delicious cauliflower choice! - See more at: http://www.westcoastseeds.com/productdetail/Vegetable-Seeds/Cauliflower/Graffiti/#sthash.aVpVFxXT.dpuf
Easily the darkest and "truest" of the purple cauliflowers, Graffiti is here to brighten the plate and jazz up the vegetable patch! This widely adapted, vigorous variety sets large heads of deep purple that keep their color even after cooking (reaching a shade of mauve). Perfect for coastal climates, the far north, and the humidity-laden south and southwest, it's both a gourmet selection and a tried-and-true dependable performer in the garden.

These heavy, well-packed heads intensify their shade of violet with exposure to sun, and need less wrapper protection than most others. They make a splendid fall crop, but are also suitable for spring. Highly resistant to downy mildew, they can withstand rainy and humid climates far easier than older varieties. And they just look spectacular!

Graffiti


The medium sized heads of this vigorous, uniform, main-season cauliflower are intensely purple, with large, purple wrapper leaves. It looks absolutely stunning when served raw on a veggie platter, but also retains most of its colour when cooked. A novel, nutritious, delicious cauliflower choice!
- See more at: http://www.westcoastseeds.com/productdetail/Vegetable-Seeds/Cauliflower/Graffiti/#sthash.aVpVFxXT.dpuf
 

Graffiti


The medium sized heads of this vigorous, uniform, main-season cauliflower are intensely purple, with large, purple wrapper leaves. It looks absolutely stunning when served raw on a veggie platter, but also retains most of its colour when cooked. A novel, nutritious, delicious cauliflower choice!
- See more at: http://www.westcoastseeds.com/productdetail/Vegetable-Seeds/Cauliflower/Graffiti/#sthash.aVpVFxXT.dpuf

Thanksgiving recipe rundown: grill-roasted turkey

And now... the turkey.

Let me preface by saying, I spent most of my life unsure I even liked turkey.

It either meant the overly processed slimy sliced stuff you were supposed to use for sandwiches, or the dry and tasteless stuff that came in stringy chunks.

And then, I had good turkey. And it completely changed my view.

Once I had turkey cooked on the grill, I knew there was no going back. It's an increasingly popular way of doing it, though the methods vary -- directly on the grate, cut into pieces, in a pan -- but this is the way I've done it the past few years. Maybe next year I'll try something new. But no matter what, I don't think my turkeys will ever see the inside of an oven.


Grill-roasted turkey
1 turkey -- preferably organic, pastured, free-range, non-processed, never frozen... you get the idea. This year, ours was a 13-pound Diestel Farms.
2 gallons of water
2 cups of kosher salt
1.5 cups of brown sugar
1 tablespoon peppercorns
1 head of garlic
6 sprigs of rosemary
6 carrots
1 bunch of celery
4 onions
2 lemons
1 stick of butter

The night before: You're going to brine the turkey. You can Google all the science behind why, so I'll just say -- it's worth it. Keep in mind that if you're using a non-organic turkey, it might already be injected with a brine solution, which is the only reason to skip this step.

Boil a few cups of the water with the salt, sugar, and peppercorns. You can add other flavorings as well, but I usually don't; I feel like it's a bit of a waste, as any spices you might use will most likely get diluted so I'd rather use them more directly. Once the salt and sugar have dissolved, combine with the rest of the water -- which should be cold -- and then submerge the whole turkey, sans gizzards and such.

There's different ways of doing this; with a smaller bird, I use my biggest pot, line it with a huge plastic bag (you can find brining bags at the store specifically for this purpose), put the turkey in, pour the brine in, tie up the brine bag and then put the whole pot into a trash bag just in case there are any leaks at all. With a bigger bird, you may want to use a cooler. If the whole contraption doesn't fit into the fridge, use ice to keep it all chilly cold and put it outside if that's the kind of climate you live in.

The day of:
After the turkey's been in the brine for 12-18 hours, remove the turkey and discard the brine. Double up two foil roasting pans and put the carrots, celery, 2 of the onions (quartered) and some of the rosemary into the pan and set the turkey on top. Slice off the top of the head of garlic and throw the whole thing in there too -- no, really. Pour a little wine or water in so the vegetables don't char and burn.

Slather the butter under the skin, over the skin, everywhere, all over the turkey. Set it into the pan on top of the vegetables. Now set it aside for an hour at room temperature.

Make 4 foil packets of wood chips. (This is simple. Soak your wood chips, then fold them into foil packets and poke a few holes in the tops of each packet. That's it.) If you've got a three-burner grill, turn all three on until the grill hits about 450 and then turn off the middle burner. That's where the turkey will go. The foil packets go on either side; put two down when the turkey goes in and then replace them once they stop smoking.

Start the turkey off at 450 for about 30 minutes, until the skin is getting quite brown and crisp, then turn the heat down to about 350 to finish. I like to have it positioned with the legs toward the back, since dark meat takes longer to cook and the back of the grill tends to get hotter than the front. Overall, mine never take very long... I think about 90 minutes total for a 13-14 pounder. If the skin starts to get too dark, just put some foil over it.

When the temperature hits 155 in the breast, pull it off the grill, cover with foil, and watch to make sure it gets to about 160 as it rests.

And... that's it!

Tuesday, December 3, 2013

Thanksgiving recipe rundown: smashed potatoes

You can't have Thanksgiving without potatoes. Maybe even two or three types. But it seems like mashed potatoes are a cornerstone Thanksgiving dish, and though you can doctor them up a bit with roasted garlic or chives or cheese, they're still just mashed potatoes.

This year, we tried something different. Smashed potatoes, in colors! No more bland white bowl on the table. Plus, you can do a lot more work before the day, making Thanksgiving just a wee bit simpler. Winner in my book! Next year, I think I'll experiment topping them with chives and a sharp and dry grated cheese.


Smashed potatoes
5 pounds of baby (3-4" size) potatoes, in different colors; mine were Yukon Golds, reds and blues
1/2 stick of butter
1/4 cup of olive oil
3 cloves of garlic, minced
Salt and pepper to taste

Day 1: Boil the potatoes in heavily salted water until tender when pierced with a fork. Drain. Cool and refrigerate.

Day 2: Gently smash each potato with the bottom of a glass until it cracks and splits but is still in (mostly) one piece. Transfer to a baking dish and repeat until all the potatoes are in a single layer (you may need more than one dish).

Melt the butter in a small bowl or pan, add the olive oil and garlic, and hold over gentle heat until the garlic has thoroughly scented the butter and oil. Then pour over the potatoes in the baking dish and salt and pepper to taste.

About an hour before dinnertime, you're ready to bake!

Bake at 450 degrees for about 20 minutes, until the potatoes are really sizzling, and then flip them and give them another 20 minutes. You should start to see the edges crisp up and turn golden brown.

Serve while still hot, topped with herbs, cheese, more salt and pepper, vinegar... the possibilities are endless!

Monday, December 2, 2013

Thanksgiving recipe rundown: cranberry-persimmon sauce

Thanksgiving is behind us, though there are still plenty of leftovers in the fridge, and I figured I'd share some of the lessons learned from the recipes I tried this year. Nothing was a total flop, but there are definitely things I'd do differently for a few, and then a few really stood out as ones to save and repeat as often as possible. Here's one, inspired by this 2005 Gourmet recipe.

Cranberry-persimmon sauce
1 bag of cranberries
1 cup of white sugar (or to taste. My cranberries seemed especially tart this year)
1 star anise
1/2 cup water
1 teaspoon of vanilla extract
3 ripe Fuyu persimmons
Sprinkle of cinnamon

Boil the cranberries, white sugar, star anise and vanilla extract together in the water. Stir occasionally.


Once the cranberries pop, the sauce is done; take it off the heat, remove the star anise, and let it cool. It'll gel as it cools.


While you're waiting, peel and dice up the Fuyu persimmons into very small cubes -- about 1/4" square. Don't worry too much about whether or not they're ripe; Fuyus can be sweet even when still very hard. Mine were on the softer side so I knew there were sweet without a doubt. Then fold them into the cooled sauce, and stir in just a touch of cinnamon.

It doesn't get much easier than that! But this sauce is so good, I was eating it by the spoonful. And I've never been much of a cranberry sauce lover. I may experiment with turning it into a jam that can be canned so we can enjoy it year-round.

Next up: smashed potatoes that will make you wonder why you'd ever bother with the mashed kind...


Wednesday, November 20, 2013

Changing colors...

I had no idea that there were trees that would change color and drop their leaves in fall even in our climate. Granted, the colors aren't nearly as brilliant as they are in the Great Smoky Mountains of my youth, but there is something incredibly satisfying about a seasonal ritual like raking leaves (until I'm doing it for the third time... then I'm over it). It's one of those little things that makes me disproportionately happy.


American sweetgum tree (Wikipedia link)
Liquidambar styraciflua is a deciduous tree native to the warm temperate areas of eastern North America and regions of Mexico and Central America. A popular ornamental tree in temperate climates, it is recognizable by the combination of its five-pointed star-shaped leaves and its hard, spiked fruits (which you can apparently avoid by sterilizing the tree once a year... we're determined to do this as those spiky balls make the lawn underneath impossible to walk on with bare feet).


Monday, November 18, 2013

The force is strong... within my fig tree!

I've always wanted a fig tree. Once that had multiple trunks, spreading wide, with a sculptural shape and of course -- lots of fruit. Because -- no offense, Trader Joe's -- there is NOTHING like a fresh fig.

I also had the perfect spot for it: directly between my kitchen window and the massive new steel-and-glass spaceship-like hospital they have built across the canyon that completely kills the rural feel of our home. I dreamt of a massive fig tree with broad, handsome leaves that I could look at while doing the dishes.

I picked up this Black Mission a few months ago, right before we went out of town for the weekend as our last getaway before the new Baby Bluebird arrived. Unfortunately, that weekend was unseasonably hot and dry with Santa Ana winds pushing the temps up into the mid-90s while incredibly dessicating gusts fried it to a crisp despite the fact that I had given it several soakings before we left. Every single leaf got crispy and brown and fell off my tree.

Despite my initial inclination to take it back, I asked the Irish Husband Boxer to plant it (I'm sure he felt a little silly planting a leafless stick, but I think he's getting used to my weird requests). He even set up a little drip irrigation emitter for the stick. Because even leafless sticks need water... right?

Well this little fig tree has bounced back with a vengeance! and I couldn't be happier. I wasn't sure if it'd leaf out in "fall," but apparently our weather has been mild enough that the tree didn't mind actively growing. Hopefully it really takes off and gives me my "unruined" kitchen window view -- and fresh figs! -- soon.


Who's the new little buddy who hasn't budged since yesterday?

Sunday, November 17, 2013

A recipe for "healthy" cookies

Food fads come and go. From low-fat to low-sugar to low-carb, low-GI, gluten-free, raw, macro, ketosis...

I can't really be bothered to follow a prescribed diet. My personal stance has landed somewhere in the gray area between whole food, high-plant, healthy fat, and two-working-parents-two-kids-busy-family.

These cookies are based on "lactation cookie" recipes that you can find online, but there's nothing in them that induces lactation, herbally or otherwise. Rather, they just have certain ingredients that are natural but pack a powerful punch when it comes to certain vitamins and nutrients. (Did I mention I'm horrible at taking vitamins, too?) They're not low-fat or low-carb, but there is nothing artificial or highly processed in them -- so whether it's the Irish Boxer Husband grabbing one on his way out the door, the Monkey asking for one with breakfast, or me enjoying one with my morning coffee, I feel good about having a jar of them around.


High-Nutrition Oatmeal Chocolate Chip Cookies (makes 4 dozen)
1/2 cup butter (organic, unsalted if you can find it)
1/2 extra virgin coconut oil
2 cups firmly packed brown sugar
4 tablespoons warm water
4 tablespoons ground flaxseed
2 eggs
1 teaspoon vanilla
1 1/2 cups whole wheat flour
1/4 cup brewer's yeast
2 tablespoons wheat germ
2 teaspoons baking powder
1 teaspoon salt
3 cups whole rolled oats
1 cup chocolate chips
1 cup chopped walnuts

Mix together the water and flaxseed; set aside.
Soften the butter and coconut oil, then cream together with the brown sugar. Add in eggs, one at a time, beating well; then add in vanilla.

Sift together the flour, yeast, wheat germ, baking powder and salt. Add the butter/coconut oil blend and the soaked flaxseed, and mix well. Then stir in the oats, chocolate chips and walnuts.

Drop by spoonfuls onto parchment paper and bake for 12-15 minutes at 350 degrees, until lightly browned. Cool on a rack... if you can wait that long :-)

Saturday, November 9, 2013

I have plans for you...

I planted Lincoln Garden Pea seeds on September 8th. They looked decent at first, but then really started to struggle. I realized they were being attacked by cabbage loopers... ugh. A quick Bt spray later, they are bouncing back.

After 4 days out of town, I came home to find my first blossoms!

I am determined that the first solid food to pass into our new Baby Bluebird's mouth will be home-grown, heirloom, non-GMO, organic peas. Cannot wait!

Lincoln Garden Pea
An old-time pea introduced in 1908. High-yielding and tasty, this pea does better than many in warmer weather. The tightly-filled pods are easy to shell, and compact vines are a good choice for small gardens.